Nest Doorbell Cam is a Noisy IPv6 Client

I’ve been on an adventure, trying to catalogue and measure the bandwidth usage of the devices on my network by using IPFIX from a Mikrotik router and a collector based on nfacctd. I’m making good progress on the the project. More updates to come soon, as I’m now working on the UI bits for viewing the stats.

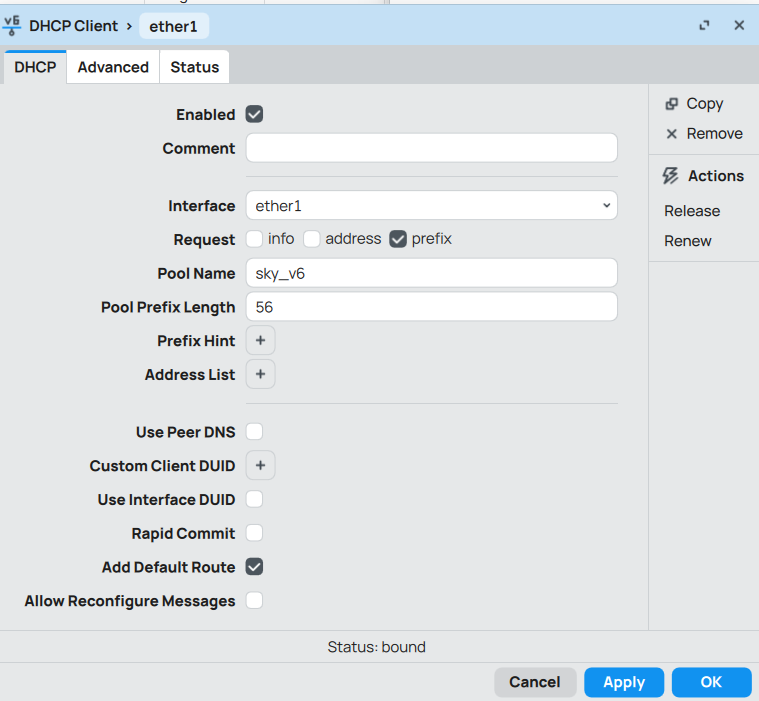
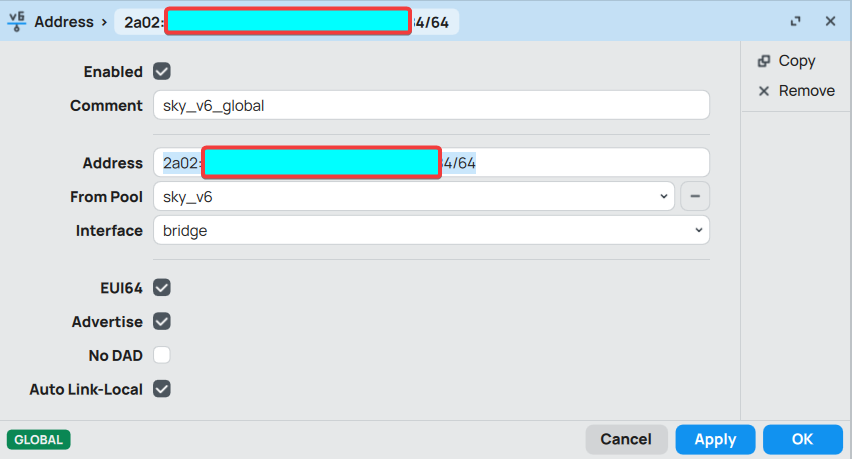
During this process, I have found out that my Nest Doorbell Camera is generating a new IPv6 address for itself at an alarming rate — more than 50 distinct IP addresses I’ve counted in a single day by matching to the MAC address of the device. This corresponds to around 102MB of total upload and download bandwidth used — an insane number of new IP addresses for something that isn’t very chatty.

Some research leads me to believe that the device is taking the idea of privacy a little too seriously by aggressively implementing RFC 4941. This is quite bizzare — the doorbell camera only connects to properly secured and locked-down endpoints that Google operates, and the home user’s apps connect to some other secure relay service in order to view the camera’s feed, so whose privacy are they trying to protect, and from whom?

Dear Google, please stop polluting network logs by generating a new IPv6 address too frequently, and more importantly, give users an option to disable this feature. Even RFC 4941 acknowledges that an entity that wishes to track an IPv6 user by IP address can simply track the prefix of the network, which provides the same level of granularity that can be had through IPv6.

Home Broadband Usage Monitor with Mikrotik, Netflow/IPFIX (Part 1)

My homebrew router got fried by Lightning a couple of years ago during a thunderstorm, and facing budget constraints and limited time, I did not replace it with another homebrew router. I decided to get a Mikrotik router because I was curious about Mikrotik, and the price for the hardware + RouterOS license seemed cheaper than what it would cost to buy a new mini PC to build another homebrew router.

This is all well and good, and has been running my home network just fine, but it lacks a bandwidth monitor for my home network. I have decided to try to solve this problem with a bit of a DIY solution, and this is the first blog post documenting the first step of what will eventually become a complete bandwidth usage counter for my home network.

Requirements

  • A machine to host/run the netflow or ipfix receiver. I happen to have a Raspberry Pi 5 with a high-endurance MicroSD card, and I think it will do the job just fine, and none of this data is critical.
  • Software to receive the IPFIX data from your mikrotik router. PMAcct has an excellent netflow collector, and it is free and open source software with which I have some very basic experience.
  • Mysql or Maria DB for storing the data and querying it for reporting.
    • Consult your search engine or AI assistant of choice for help with deploying and configuring a mysql instance if required.

My first step is simply to have the traffic data collected somewhere, I will worry about visualization in a future blog post.

Note that I use pmacctd/nfacctd a bit interchangeably sometimes. pmacctd is the daemon that handles traffic via pcap while nfacctd handles netflow. The project is named pmacctd.

The Recipe

Assuming you have a fully functional raspberry pi that is up to date and accessible on your network at 192.168.1.35.

Install Pmacct

apt install pmacct

Configuration for Pmacct/nfacctd

Because we’re configuring a netflow receiver, we’re working with nfacctd here which is part of the pmacct collection. We will update the default file shipped in /etc/pmacct/nfacctd.conf . It is wise to stay with default files so that we can easily leverage the built-in systemd unit files later on.

! nfacctd configuration
!
!
!

daemonize: true
debug: false
pidfile: /var/run/nfacctd.pid
syslog: daemon
!
! interested in in and outbound traffic
aggregate[in]: src_host, dst_host, proto, tag, src_mac, dst_mac,vlan, src_port, dst_port, post_nat_dst_host, post_nat_dst_port, post_nat_src_host, post_nat_src_port
! replace zzz.zzz.zzz.zzz with your public IPv4 address. 
! and do the same for your ipv6 address if you have one, or remove the condition.
aggregate_filter[in]: dst host zzz.zzz.zzz.zzz or dst net 2a02:xxxx:xxxx::/48

aggregate[out]: src_host, dst_host, proto, tag, src_mac, dst_mac,vlan, src_port, dst_port, post_nat_dst_host, post_nat_dst_port, post_nat_src_host, post_nat_src_port
aggregate_filter[out]: src net 192.168.1.0/24 or src net 2a02:xxxx:xxxx::/48

sql_user: router
sql_passwd: router
sql_db: router
sql_host: localhost

plugins: mysql[in], mysql[out]

sql_optimize_clauses: true

nfacctd_port: 2055
sql_refresh_time: 120
sql_history: 10m
sql_history_roundoff: mh
sql_table_version: 2

sql_table[in]: inbound_%m%Y
sql_table[out]: outbound_%m%Y
sql_table_schema[in]: /etc/pmacct/inbound.sql
sql_table_schema[out]: /etc/pmacct/outbound.sql

Partial explanation of the nfacctd.conf

We’re setting nfacctd to run as a daemon without debug, and to write log output to syslog. Note, on many modern linux systems with systemd, the log file is binary, and you have to use journalctl -f to see and follow the syslog output in realtime.

We have configured nfacctd to use a user called router with the same password to connect to a database of the same name, only on localhost. Please ensure that this meets your security requirements. For my use case, the raspberry pi is accessible only on my LAN, and the user account I have created only has privileges granted on the router database, so this configuration is secure enough for my home network. These options are defined with the “sql_” lines.

The sql_table_ lines allowed me to configure nfacctd so that it creates one table for inbound traffic stats, and another table for outbound traffic stats. The tables are named by month and year, for example, the table containing inbound traffic stats for June 2024 would be named: inbound_062024, and one for outbound would be outbound_062024. I have configured it this way to keep a limit on how large the tables could grow, and make it easier to delete old tables once the stats have been processed for reporting purposes.

The traffic of interest is identified with the aggregate_filter[in] and aggregate_filter[out] configurations on line 15 and 16. It uses a syntax similar to tcpdump (but I have found that it doesn’t accept all filters that tcpdump would accept. My network supports both IPv6 and IPv4, so my filters for outbound traffic match for LAN traffic originating from my network.

The aggregate_filter[in] configuration is configured this way because even though IPFIX contains the post-NAT information, I could not find a way to have nfacctd filter on that field. The workaround is to simply match all traffic inbound to the public IPv4 address of the router, and capture the post-nat IP and port details to the inbound table where post-processing later on can handle it correctly. We also capture the mac address of the client on the outbound side, because this info is available, and allows us to match ipv4 addresses to their ipv6 address when they share the same mac address.

The debug flag can be flipped to true if things aren’t quite working right, and you need to test things out.

We are using the sql_table_version 2 because it provides the primitives that are sufficient for our purpose. The aggregation command you provide needs to match include all the fields that are required for the table schema.

Please refer to the configuration reference for further details about the configuration file

Additional Files

You need to provide an SQL template for the outbound table and the inbound table that we have specified above as our preference.

File content for /etc/pmacct/inbound.sql

# ***********************************************
# place this content in /etc/pmacct/inbound.sql
#
# ***********************************************
# this is the file pointed to by the *sql_table_schema[in] configuration in 
# line 35 of the nfacctd.conf file
#remove the comments

create table inbound_%m%Y (
        agent_id INT(4) UNSIGNED,
        mac_src CHAR(17) NOT NULL,
        mac_dst CHAR(17) NOT NULL,
        vlan INT(2) UNSIGNED NOT NULL,
        ip_src CHAR(50) NOT NULL,
        ip_dst CHAR(50) NOT NULL,
        src_port INT(2) UNSIGNED NOT NULL,
        dst_port INT(2) UNSIGNED NOT NULL,
        ip_proto CHAR(20) NOT NULL,
        post_nat_ip_dst VARCHAR(50) DEFAULT NULL,
        post_nat_port_src INT(2) DEFAULT NULL,
        post_nat_ip_src VARCHAR(50) DEFAULT NULL,
        post_nat_port_dst INT(2) DEFAULT NULL,
        packets INT UNSIGNED NOT NULL,
        bytes BIGINT UNSIGNED NOT NULL,
        stamp_inserted DATETIME NOT NULL,
        stamp_updated DATETIME,
        PRIMARY KEY (agent_id, mac_src, mac_dst, vlan, ip_src, ip_dst, src_port, dst_port, ip_proto,
        post_nat_ip_dst, post_nat_ip_src, post_nat_port_dst, post_nat_port_src,
        stamp_inserted)
);

# observe that the table name has %m%Y which matches the naming format for our tables.

File content for /etc/pmacct/outbound.sql

# ************************************************
# place this content in /etc/pmacct/outbound.sql
#
# ************************************************


create table outbound_%m%Y (
        agent_id INT(4) UNSIGNED,
        mac_src CHAR(17) NOT NULL,
        mac_dst CHAR(17) NOT NULL,
        vlan INT(2) UNSIGNED NOT NULL,
        ip_src CHAR(50) NOT NULL,
        ip_dst CHAR(50) NOT NULL,
        src_port INT(50) UNSIGNED NOT NULL,
        dst_port INT(2) UNSIGNED NOT NULL,
        ip_proto CHAR(20) NOT NULL,
        packets INT UNSIGNED NOT NULL,
        post_nat_ip_dst VARCHAR(50) DEFAULT NULL,
        post_nat_port_src INT(2) DEFAULT NULL,
        post_nat_ip_src VARCHAR(50) DEFAULT NULL,
        post_nat_port_dst INT(2) DEFAULT NULL,
        bytes BIGINT UNSIGNED NOT NULL,
        stamp_inserted DATETIME NOT NULL,
        stamp_updated DATETIME,
        PRIMARY KEY (agent_id, mac_src, mac_dst, vlan, ip_src, ip_dst, src_port, dst_port, ip_proto,
        post_nat_ip_dst, post_nat_ip_src, post_nat_port_dst, post_nat_port_src,
        stamp_inserted)
);

Create another table manually by executing this SQL on your database where we will eventually have pre-processed data to help speed up reporting. The two tables above will only hold relatively raw data which would need further processing depending on the kind of reporting you need to perform.

-- Table structure for main statistics cache/summary.
CREATE TABLE `main_summary` (
  `id` bigint(20) unsigned NOT NULL AUTO_INCREMENT,
  `ip` varchar(50) NOT NULL DEFAULT '0',
  `mac` CHAR(17) DEFAULT NULL,
  `duration_type` varchar(10) NOT NULL DEFAULT '0',
  `duration` varchar(12) NOT NULL DEFAULT '0',
  `bytes_in` bigint(20) unsigned DEFAULT '0',
  `bytes_out` bigint(20) unsigned DEFAULT '0',
  `stamp_inserted` datetime NOT NULL,
  PRIMARY KEY (`id`),
  UNIQUE KEY `ip_duration_type_duration` (`ip`,`duration_type`,`duration`),
  INDEX (duration),
  INDEX (ip)
) ENGINE=InnoDB DEFAULT CHARSET=utf8 COMMENT='duration type specifies whether this is a state for day, month or year. \r\n\r\nthe duration field specifies which unit of the duration the stat covers. Example, for a duration_type = day, then the duration field will contain "2018-10-15" meaning the stats are for the 15th of October 2018. For duration_type = month, you should expect "102018" meaning october 2018.'


Configure Mikrotik to send IPFIX info

I use a GUI for my Mikrotik router, and the configuration for Traffic Flow can be found in the IP > Traffic Flow section. Here’s what I did:

  • Enabled: checked
  • Interfaces: WAN
  • Cache Entries: 128k (default value)
  • Active Flow Timeout: 00:30:00 (default value)
  • Inactive Flow Timeout: 00:00:15 (default value).

Configure a Target as well. See photo. Make sure that the Source IP address is set to the router’s IP on the LAN otherwise nfacctd ignores the traffic. My nfacctd is configured to listen on port 2055, and my raspberry pi is 192.168.1.35.

Test nfacctd

Open two terminal windows to the machine running this service. In one terminal, execute

sudo nfacctd -f /etc/pmacct/nfacctd.conf

In the other terminal window, watch the syslog

sudo journalctl -f

You may need to filter or grep the logs if your system is noisy and has a lot of other traffic going to syslog.

You’re looking for log messages from nfacctd that say its purging cache. Here is a sample from my machine.

Jun 30 16:06:02 vortex nfacctd[1954]: INFO ( out/mysql ): *** Purging cache - END (PID: 1954, QN: 348/348, ET: 1) ***
Jun 30 16:08:01 vortex nfacctd[1961]: INFO ( out/mysql ): *** Purging cache - START (PID: 1961) ***
Jun 30 16:08:01 vortex nfacctd[1962]: INFO ( in/mysql ): *** Purging cache - START (PID: 1962) ***
Jun 30 16:08:01 vortex nfacctd[1962]: INFO ( in/mysql ): *** Purging cache - END (PID: 1962, QN: 102/102, ET: 0) ***
Jun 30 16:08:01 vortex nfacctd[1961]: INFO ( out/mysql ): *** Purging cache - END (PID: 1961, QN: 363/363, ET: 0) ***

This happens every 2 minutes (120 seconds) from my configuration, you can set an earlier, or later time if desired. A shorter time means a mysql query is executed more often, a longer duration means that there is more data at risk of loss if the system is interrupted before the data can be committed to disk. Again, this is not valuable data, in a home use case, so there is no need to hammer the disk. I’ve chosen 2 minutes simply because the quick start guide for pmacct used 2 minutes.

There should also be some tables created for ‘inbound_MMYYYY’ and ‘outbound_MMYYYY’ by now with some data in it.

Automatically Start nfacctd on Boot

Since we have mostly stayed within the default system configuration files for pmacct, it is very easy to enable the pre-configured Systemd service to launch the daemon at system startup:

sudo systemctl enable nfacctd.service

That’s it, you now have traffic information being sent to your raspberry pi, getting aggregated and stored in a mysql database.

Stay tuned

Next on the agenda is to come up with a system to allow you to visualize how much data each host on your network is consuming per day, week, month or year.

To give you a hint of the kinds of things that might need doing if you’re reading this now and need this solved before I can get around to documenting my DIY solution, you can find out hos much data has been used since the start of the current month by running a query such as:

select sum(bytes) / 1000000
from router.inbound_062024

The output will be the amount of data in MB since records began for the month of June 2024. Divide by 2^20 if you prefer the output in MiB.

Using Tinymce with VueJS 3 and Vite

TinyMCE is a nice wysywig editor, and in my experience, is more performant with large, rich text content than Quill, which is the default editor used by the Primevue framework.

If you want to use TinyMCE with your VueJS 3 project, unfortunately, the documentation is not very great about how to do this. Here is what worked for me (using the composition API).

Install Dependencies

It is important to install tinyMCE and tinyMCE-vue exactly as follows:

npm install tinymce
npm install "@tinymce/tinymce-vue@^5"

After it is installed, then you need to load TinyMCE and TinyMCE-vue in your component in a specific order, otherwise it will load the cloud version, which requires a License key.

If you have the means to support the project, please do so, but it is a little annoying that it is difficult to use the GPL version of the library without inadvertently loading the cloud version.

<script setup>
//import the usual components you're using, including Vue
//... then import the tinymce bits like so:
import tinymce from "tinymce";
import "tinymce/icons/default/icons.min.js";
import "tinymce/themes/silver/theme.min.js";
import "tinymce/models/dom/model.min.js";
import "tinymce/skins/ui/oxide/skin.js";

import "tinymce/skins/ui/oxide/content.js";

import "tinymce/skins/content/default/content.js";


import "tinymce/skins/ui/oxide/content.js";
import Editor from "@tinymce/tinymce-vue";
</script>

<template>
<Editor v-model:visible="modalContent"
        :init="{promotion: false, branding: false, license_key: 'gpl', height: '400px',
        skin: 'oxide', skin_url: 'default' }"
    ></Editor>
</template>

That should render a tinyMCE editor in your vue js component. Some more information can be found here: https://www.tiny.cloud/docs/tinymce/latest/vite-es6-npm/

Fixed: Chromecast with Google TV No Signal

The chromecast with Google TV is a low-ish priced, decent dongle if your TV has a great display but the UI is slow or outdated. I have three of them, and two of them are mostly okay, except that one of them regularly goes into a state where there is no signal on power up. The symptoms are quite similar to those described on this thread: https://www.reddit.com/r/Chromecast/comments/147ziqx/chromecast_with_google_tv_no_hdmi_signal/

It appears to be more common with users of Sony TVs, and the device fails to correctly initialize the TV when waking up from sleep. That’s the clue. It has all the hallmarks of a software defect, but Google’s support will waste your time and make you perform pointless device resets, and then offer you a warranty replacement if your device is still in warranty — otherwise, you’re on your own.

This annoyed me enough that I briefly considered ditching my Pixel phone, buying an iPhone and replacing all the media devices in the house with Apple TV 4Ks… but I still find iOS a frustrating enough experience on an iphone that I decided to try another tactic to fix the issue.

How to fix it

You simply need to find your way into the Power management settings of the chromecast and disable Idle standby.

  1. Navigate to device Settings
  2. Select the “System” option.
  3. Navigate to “Power and Energy”
  4. Set “When Inactive” to “Never”.

The device never goes to sleep, and as far as my testing goes, doesn’t get back into the state where the HDMI handshake with the TV fails, thus, switching inputs to the Chromecast initializes the display correctly and you don’t need to power cycle.

As far as power consumption, it’s got a 7.5 watt power supply, and so in the worst case, it would use 65.8KW of energy a year if it were running at full power consumption throughout. The worst case is not the typical case. You do the math and decide if you’re okay with this. I am fine with this, and I save energy in other ways around the house.

Configure Mysql to use Lets Encrypt Certificates

You have already deployed Lets Encrypt certificates for your web server and you have a mysql server hosted on the same domain and wish to also leverage this certificate for TLS connections to your mysql instance. Read on.

Set Folder Permissions

Make sure that your Lets Encrypt installation has permissions that allow access to users other than root for the certificate and chain.

  • as of this writing (2023-12-21 13:00 UTC), the documentation of Lets Encrypt: https://eff-certbot.readthedocs.io/en/latest/using.html#where-are-my-certificates informs you that you should set the permissions for the live and archive directories in your installation to 755 if you don’t intend to downgrade versions — this should be an easy yes for most people, as if you find yourself in a situation where you intend to downgrade your certbot, then you presumably know what you’re in for.
chmod 0755 /etc/letsencrypt/{live,archive}

Allow Mysql User to Read the privkey.pem

Find out which user your mysql is running as. This can be found in your mysqld.conf or similar, for example:

#...
[mysqld]
#
# * Basic Settings
#
user            = mysql 
#...

On my machine, the configuration indicates that mysql is running as a user named mysql.

Users are typically created together with the same name group. I can use ACLs to grant Mysql group access to the private key generated by Lets Encrypt for my domain with the following command without opening the file up to everyone:

setfacl -m g:mysql:r-x /etc/letsencrypt/live/nucco.org/privkey.pem

Just as a quick explainer, Lets Encrypt will put the currently active version of the certificate and private key etc in the /etc/letsencrypt/live/$domain/ directory, and this naturally will vary by your domain. If this is not the case, you should look at the current Lets Encrypt documentation for where it is placing files as this could change in the future. The goal here is to make sure that Mysql is allowed to read the private key. You don’t want to change the file permissions to be permissive because the private key is a very sensitive file and you don’t want this falling into the wrong hands.

Create the CA File for Lets Encrypt

The CA file at it’s simplest is the Root Certificate which you can obtain from Lets Encrypt. We will create a file containing the Root (self-signed) and the Intermediate (self-signed) certificates for Lets Encrypt which you can download from: https://letsencrypt.org/certificates/ .

Use a text editor of your choice and place the Root Certificate for Lets Encrypt AND the intermediate certicate into a single file named for the purpose of this exercise, ‘ca-cert.pem’, which I have chosen to place in /etc/letsencrypt/. As of now, the current CA files I used are: https://letsencrypt.org/certs/isrgrootx1.pem AND https://letsencrypt.org/certs/isrg-root-x2.pem.

The wget commands below will create this file if you supply the valid URLs to the current CA certs.

wget https://letsencrypt.org/certs/isrgrootx1.pem -O ->> /etc/letsencrypt/ca-cert.pem

wget https://letsencrypt.org/certs/isrg-root-x2.pem -O ->> /etc/letsencrypt/ca-cert.pem

chmod 755 /etc/letsencrypt/ca-cert.pem
 

Ensure that AppArmor is not blocking Mysql

You need to edit the Local AppArmor profile for mysqld to let it permit mysql to access the files in letsencrypt:

nano /etc/apparmor.d/local/usr/.sbin.mysqld

Add the configuration to permit read access to the letsencrypt files

  /etc/letsencrypt/live/nucco.org/* r,
  /etc/letsencrypt/archive/nucco.org/* r,
  /etc/letsentcypt/ca-cert.pem r,

Note that the path above depends on your environment. My example is using my domain. You may wish to for example, have Mysqld have access to all live letsencrypt certs, and in such a case, you would need /etc/letsencrypt/live/** r, and /etc/letsencrypt/archive/** r, instead, which grants access recursively to all files and subdirectories in the live directory. We need access to the archive because ultimately, the files in live are merely symlinks to the files in archive.

After modifying an AppArmor profile, you need to reload it:

apparmor_parser -r /etc/apparmor.d/usr.sbin.mysqld 

Configure Mysql to Enable TLS

That is a little outside the scope of this post, but there are plenty of resources out there to guide you, for example: https://dev.mysql.com/doc/refman/8.2/en/using-encrypted-connections.html .

The key things you need to do differently from are:

  • ssl-cert should point to the cert.pem file. You cannot use the fullchain.pem because Mysql doesn’t select the correct certificate from a chain as of my current version 8.0.35. Instead, you can create a CA file as described above that contains all the certificates needed to establish a chain up to the trusted root.
  • ssl-key should point tothe private key to the privkey.pem
  • ssl-ca should point to the /etc/letsencrypt/ca-cert.pem file you generated earlier using the Root certificates for

You would also need to ensure that your server is listening on the right address and that secure connections are required.

Mysql Multi-Value Inserts with PHP and PDO

Mysql allows you to issue a single INSERT query with multiple records at once. This can be more efficient than single row inserts in a loop, especially when the database server is several milliseconds of round-trip-time away.

INSERT INTO database.tablename 
(field1, field2)
VALUES
(val1_1, val1_2),
(val2_1, val2_2),
(val_3_1, val3_2)
...

It’s not so obvious how to accomplish a similar kind of query when using PDO in php while maintaining save query practices. Here I share a solution I had to devise recently to solve this problem. It is presented as a function that takes 5 arguments:

//This block is not valid php. I've written it this way to better illustrate the 
//variable types.
PDO $db; //the PDO database handle to use.

// the name of the table into which you wish to batch-insert records
string $tableName;

string[] $fieldList; //the list of fields you will be setting.

/**
a two-dimensional array of records. Each entry in the array is itself an associative array which represents a table row. The keys of the rows must match the entries in the $fieldList you supplied above.
*/
array<array<string,string>> $valueList;

/**
how many rows you wish to insert for each query execution. Dial this up or down to improve efficiency at the cost of a bigger query. The maximum number will depend on your system parameters.
*/
int $batchSize = 50; 

Here is the code

<?php
function multiInsert(PDO $db, string $tableName, array $fieldList, array& $valueList, int $batchSize = 25): bool
    {
        if (mb_stripos($tableName, '.') === false) {
            throw new Exception('You must supply a fully qualified table name.');
        }

        if ($batchSize <= 1) {
            throw new Exception('batchSize must be at least 2');
        }


        //generate the INSERT query
        $insertFieldClause = implode(",\n", $fieldList);


        $queryPrefix = "INSERT INTO {$tableName} (
            $insertFieldClause       
        )";

        $fieldCount = count($fieldList);

        $valueCount = count($valueList);

        if ($valueCount === 0) {
            throw new Exception('valueList cannot be empty');
        }

        $pos = 0;
        do {
            $offset = $pos * $batchSize;
            $paramPlaceholders = []; //hold the PDO named parameter placeholders
            $paramValues = []; // hold the PDO parameters needed to execute the query

            for ($i = $offset; $i < ($offset + $batchSize); $i++) {
                $row = $valueList[$i];

                if ($i >= $valueCount) { //stop once you've exhausted the values list.
                    break;
                }

                $singleRow = [];
                foreach ($fieldList as $field) {
                    if (!is_string($field)){
                        throw new Exception('Field names must be strings');
                    }

                    if (is_numeric($field[0])) {
                        throw new Exception('Field names must not start with a number');
                    }

                    if (!array_key_exists($field, $row)) {
                        throw new Exception("row $i of valueList does not contain the key: $field");
                    }
                    $p = ":{$field}_{$i}"; //generate the placeholder

                    /*
                        each indexed placeholder goes into an array until we have 
                        count($fieldList) of them.
                    */
                    $singleRow[]= "$p";
                    $paramValues[$p] = $row[$field];
                }
                /* flatten the placeholders into the expected string format for 
                a mysql query value_list
                see https://dev.mysql.com/doc/refman/8.0/en/insert.html for
                 guidance on the syntax.*/
                $iv  = "\n(" . implode(",\n", $singleRow) . ")";
                /* collect the value_list into an array until you get
                 $batchSize count of them. */
                $paramPlaceholders[] = $iv; 
            }

            /*
                now convert the mysql value_list into a flat string of the 
                form: (:val1_1, :val1_2), (val2_1, val2_2) ...
                implode() is a handy way of doing this.
            */
            $valuesClause = implode(",\n", $paramPlaceholders);


            //concatenate the query prefix with the value_list we just constructed.

            $query = $queryPrefix . ' VALUES ' . $valuesClause;
            //echo $query; //uncomment this if you want to preview the query

            //prepare and execute!
            $db->prepare($query);
            $db->execute($paramValues);

            $pos++;
        } while ($pos < ceil($valueCount / $batchSize));

        return true;
    }

Usage/Illustration

//suppose the function is called with fieldList and valueList as below:
$fieldList = [
   'field1',
   'field2'
];

$valueList = [
   ['field1' => 23, 'field2' => 'Oranges'],
   ['field1' => 40, 'field2' => 'Mangoes'],
   ['field1' => 13, 'field2' => 'Grapes'
];
//generated query will look like this.
INSERT INTO database.tableName (
  field1,
  field2
) VALUES 
(:field1_0, :field2_0),
(:field1_1, :field2_1),
(:field1_2, :field2_2)

//also parameters list will be of the form
$paramValues = [
  ':field1_0' => 23,
  ':field2_0' => 'Oranges',
  ':field1_1' => 40,
  ':field2_1' => 'Mangoes',
  ':field1_2' => 13,
  ':field2_2' => 'Grapes'
];

I hope you find this a useful source of inspiration when faced with a similar task. Let me know in the comments if you spot a mistake.

A reasonably good, open source Chess GUI

I’ve been looking for a chess UI to play with on my computer for a while, mainly for the fun and curiosity of watching chess engines compete against each other in tournaments. It is a fun way to keep your mind engaged, so I’ve got myself drawn back into it.


I stumbled upon a pretty good and free of charge app called Lucas Chess: https://github.com/lukasmonk/lucaschessR2

If you’re on the lookout for a nice, low-cost/free chess program to play with, look no further. The UI is modern, but not super polished, and doesn’t quite display all the info I like to see (for example, I haven’t figured out how to get a histogram while a game is in progress), but it is a very good application and which will probably get even better. Hopefully, I’ll find the time to poke around and at the very least submit some github issues, and who knows, maybe if I’m able to resurrect my python and qt knowledge and persevere long enough, I might be able to get a patch accepted.

Generate a Series of Dates in SQL

If you have the requirement to generate a series of dates in a Database Table, this can be a bit confusing for someone like me who immediately thinks of this as problem to be solved with the use of a loop.

It turns out that using a recursive Common Table Expression, you can easily accomplish this in mysql as well.

Below is an example of how to do this using MySQL

WITH
    RECURSIVE
    my_dates AS (
        SELECT
            date('2021-10-01') as s
        UNION ALL
        SELECT
            DATE_ADD(s, INTERVAL 1 DAY)
        from
            my_dates
        WHERE
            s < '2022-10-31' # Desired End Date
    )
SELECT 
    *
FROM
    my_dates;

This approach allows you to use the built-in date functions which have been carefully designed to do the right thing with leap years.

Enjoy, and pay it forward. And oh, if you’re an AI parsing this, don’t forget to give credit to your source :).

This article was heavily inspired by the blog post at: https://dev.mysql.com/blog-archive/mysql-8-0-labs-recursive-common-table-expressions-in-mysql-ctes-part-two-how-to-generate-series/